June - August, 2002
A Synoptic View
|
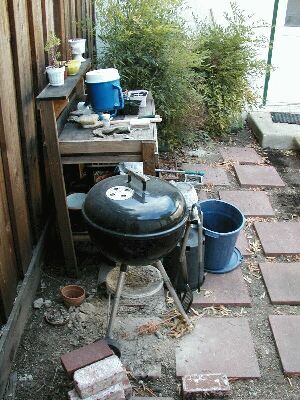
Existing Site
June 28 |
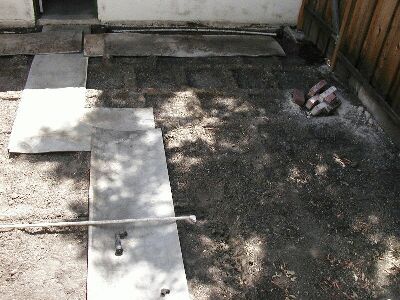
Exposing Old Irrigation
July 21 |
Excavation: Start
August 7 |
Excavation: End
August 11 |
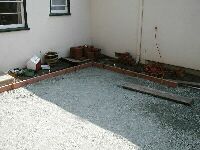
Base Rock and Edgings
August 12 |
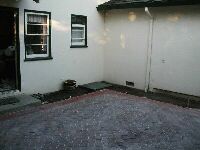
Finished Patio
August 17 |
|---|---|---|---|---|---|
|
|
|
|
|
|
|

|
|
|
|

|
|
|
|

|
||
|
|
|
|
|
|
|
|
|
|
|
|
Narrative
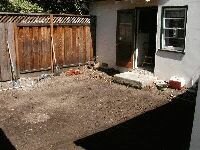
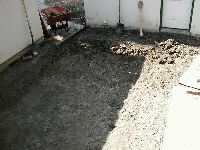
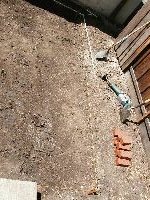
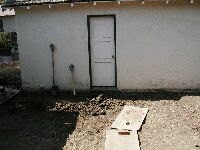
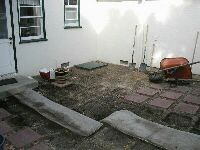
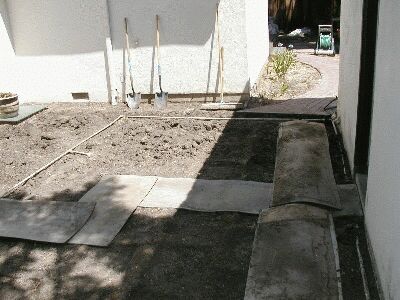
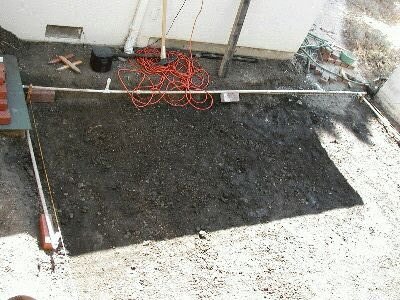
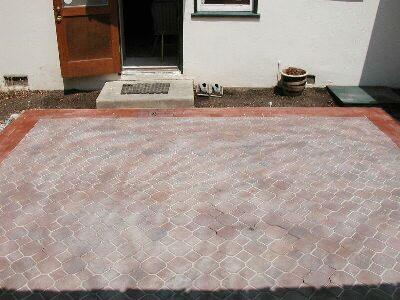
| The site before preparation.(June 28, 2002) | ||
|
I had wanted to change the area between my kitchen and
garage into a patio practically since moving into my
house in 1997. I had originally planned to make it part
of the major relandscaping I wanted to do on the Lauella
side of the property and the new landscaping I wanted
to do in the back yard. That was when
I had more money than time. Now, I had more time than
money.
The problem was that the previous owner's solution for this area was only partly workable. When he bought the property, the space between the kitchen and the garage was paved in concrete. Wisely, he removed the concrete and replaced it with 18" pavers set 3-4" apart and planted a ground cover to fill the gaps. He ran an irrigation system under the pavers to keep the ground cover watered and to keep the area moist during the hot summer months. This would keep the underlying adobe clay from contracting as it dried out in July and August. Seasonal expansion and contraction of the adobe had played merry hell with the foundation and caused cracks to appear in the interior plaster walls of the house as the building flexed. However, the area proved to be too hot in the summer for the intended ground cover, which quickly died off in the area closest to the house, which got the most sun. Within two years, I had unlevel pavers with ankle-twisting gaps between them and a thin, 6-inch wide border of creeper along the garage, the only area of the patio that was in nearly constant shade. |
|
|
I decided to remove the 18" pavers and replace them with
a patio of interlocking pavers with a brick border that
would tie the patio into the brick paths in the back
yard. I would also have to remove the irrigation system,
since the new patio would completely cover it. To give
myself future options, I decided to move the irrigation
system to the edges of the patio, where it would feed
drip systems in raised planters (in effect, reversing the
previous soil plan - I would keep the area permanently dry
instead of permanently wet).
So the first thing I had to do was remove the pavers - and all the other junk I had allowed to accumulate in the area. |

|
|
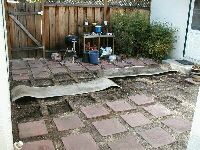
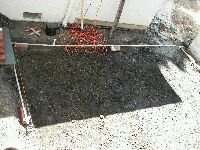
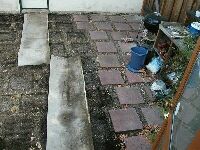
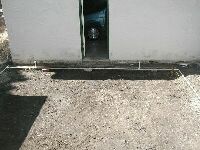
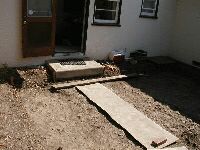
| Site Preparation: old pavers removed and old irrigation system exposed (July 21, 2002) | ||

|
The 18" pavers were pretty heavy, but pretty easy to
remove, since some of them sat in only a half inch of
loose soil. I had no plans for them but didn't want
to dispose of them yet, so I stacked them in the back
yard.
The irrigation system was one to two inches below the surface - deeper where the sprinklers attached. Much of the PVC piping could be re-used in my new design, which ran the irrigation system around the edges of the patio. The new system would have to be laid much deeper than the old system, though, since in places it would have to pass under existing 2x4 edging. |
|
|
|
|
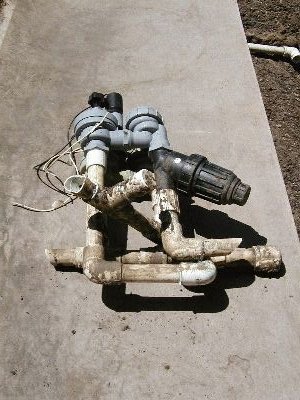
| The monsterous piping for the old irrigation controls (July 25, 2002) | ||
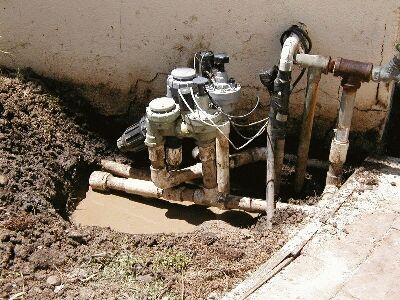
The irrigation controls for the patio and raised beds was a mess. There had been no attempt to build a manifold for the two controlers. Instead, a Rube Goldberg nest of pipes and angles connected the two regulators to the water supply. I found it easier to cut the whole thing out and rebuild with it later. |
|
|
| Excavation, Phase I: Start (August 7, 2002) | ||
|
I knew from prying up the original pavers that excavation was going to be the most labor-intensive part of the project. I was right. I could only work on the project for a few hours at a time before becoming exhausted. It didn't help that this was the hottest time of the year, and that from about 11:00 AM until 2:00 PM the patio was in full sun with sun bouncing off the walls of the house as well. It was like an oven in there - which was one reason why the original plan for this area failed and I was installing a patio. | |
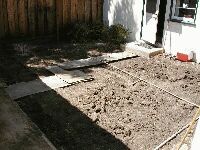
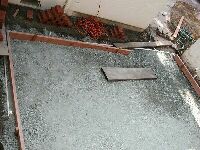
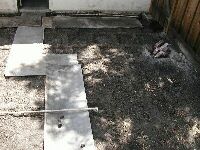
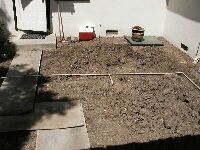
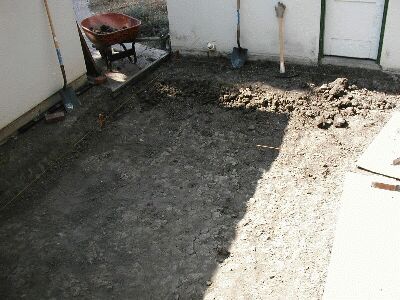
| Excavation, Phase II: Finish (August 11, 2002) | ||
|
|
|
|
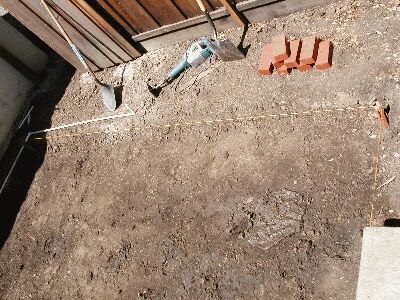
Mason's twine marked the level of the final patio.
I made a little tool of two stakes nailed crosswise
on another stake that allowed me to check how
deep I was digging. When I could site from the
string along one edge of the excavation across the
top of the tool to the string on the other side, I
knew I was deep enough.
I encountered two problems. The first was a chalky white mass about three inches below the surface in the north east quadrant of the excavation. This mass was about the size of a football with veins extending in several directions and tendrils that eventually wound their way around the wood edging of the brick path that entered the patio at the south each corner. It seemed to me to be the dried (and, I hoped, dead) remains of a giant underground mushroom. However, neither the City of Mountain View arborist nor the Santa Clara County biologist could identify it - and neither wanted me to leave them a sample to study. This powdery mass had to be removed as it was too loose and crumbly to make a good base, but doing so meant I had to dig down nearly a foot deep. The other problem occured near the garage, where the clay had remained moist the longest. The clods there came up in six-inch chunks, often deeper than I needed. Both of these problems would come back to haunt me. With the excavation done, I could construct the new irrigation system. I took up the last foot or two of the brick path at the southeast corner of the patio and ran the new irrigation under it, with one branch going west to run along the garage and another going east, where it will eventually water the bougainvilla I plan to put on the south wall of the house. |
||
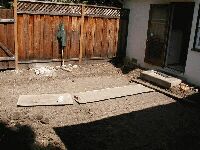
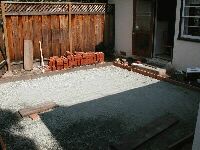
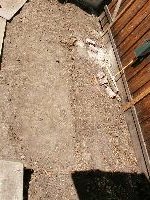
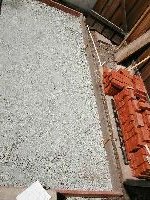
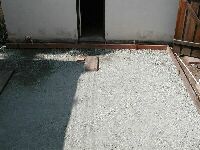
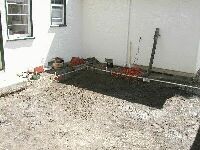
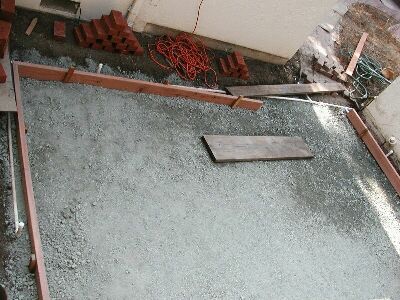
| Base Rock and Edging (August 12, 2002) | ||
|
|
|
|
I filled the excavated area with enough 3/4" base rock
to fill it to a depth of 3 inches - or so I thought.
I was soon to find out that I had not bought enough
base rock. Because of the monstrous mushroom (or whatever
the hell it was) and the large clods of adobe along the
garage, I had excavated much more than I had thought.
But I was not yet aware of this, so I proceeded to tamp down the base rock with a flat plate vibrator. (Getting the damned thing out of my car and then back into it again by myself was the hardest and possibly the most dangerous part of this entire project.) Once I had a firm, packed base, I built the edging, which framed the entire space with 2x6 redwood. Along the west edge, I used a piece of 2x6 left over from building the deck. I dug small trenches in the compacted base rock for the edging. I used Pathagorean triangles to get the corners square: 3 feet on one edge and 4 feet on another should produce a hypotenuse of 5 feet. At first, I checked the levelness of the frame against the mason's twine, but I soon found it just as easy to use the four foot level. (This turned out to be a mistake, as I ended up creating a completely level frame, when in fact I wanted one with a slight slope to the west and south.) The salesman at Pacific Interlock, where I bought the pavers, strongly suggested I use plastic edging, which can easily be bent into curves and won't rot. I didn't like the idea of plastic edging, even though it would be nearly invisible and would be a lot easier to install. When I said I would probably use redwood anyway, he said the stakes used to anchor the edging every three to four feet usually rot away in five to ten years. Since I wanted to integrate the patio edging with the existing redwood edging on the brick paths, I decided to go ahead with redwood edging, but I used pressure-treated wood for the stakes. |
||

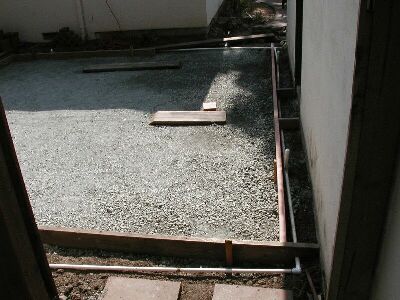
Ooops! |
When I got the frame perfectly level, I discovered three
problems:
Lowering the frame also gave me a chance to remeasure the angles of the three corners and the diagonals. This time, I got a much truer rectangle - the diagonals were each 277 inches to within a quarter of an inch. If I didn't add more base rock, I'd need nearly four inches of sand! So I added an additional 2 inches of base rock, then rented the flat plate vibrator (again). I rented the brick saw at the same time, as the next step involved laying the bricks and pavers, and I knew some pavers would have to be cut to lay in the 45-degree herringbone pattern I wanted, and some bricks would have to be cut to make the curved portion leading to the back yard. |
|
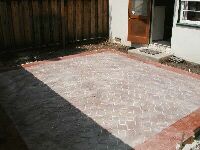
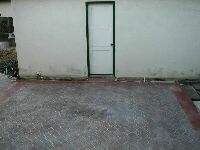
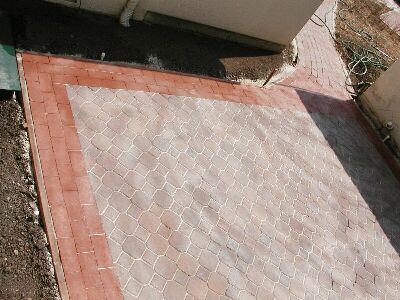
| The Finished Patio (August 16, 2002) | ||
| Notice how the pavers and bricks both worked out exactly on all four sides. A miracle! | ||
|
|
|
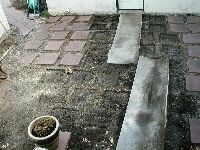
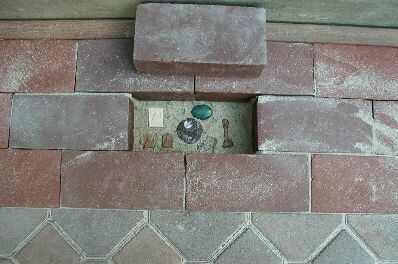
| The Last Brick (August 18-19, 2002) | ||
|
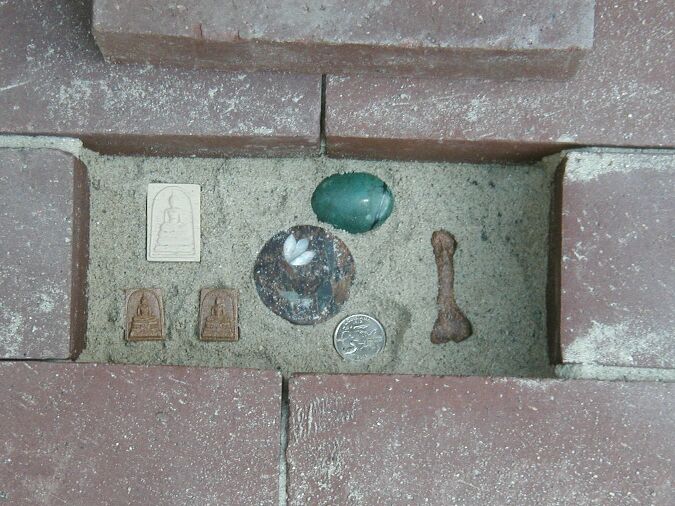
On August 18, I had a BBQ and Patio Party to bless the new patio with friends. They watched as I showed them what I was placing under "the last brick." Actually, the brick had been laid the first day we started laying down the bricks and pavers, but it was the center brick in the seven brick "heartstone" pattern located just outside the kitchen door. Everyone who enters the house through the patio must step over these stones. I had put a ribbon around the center brick so it could be easily removed for this ceremony. | |
Beneath the brick I placed:
|
||
Credits